Step 1 - LO-End :-
-
Set [FREQUENCY], [WAVE SHAPE] and
[CV A] to their minimum (CCW) position
-
Set [CV B] to ‘0’
-
Monitor [SAW-DC]
-
Adjust P101 for an output of 16Hz
Step 2 - Wave Shaper :-
-
Set P201 to its mid-position
-
Monitor [SHAPED DC]
-
Adjust P201 for best sine shape
which should be similar to that in Figure
B. Note that the wave shaping circuitry
can take a couple of seconds to stabilise
so make small adjustments and wait for the
waveform to stabilise
-
Turn [WAVE SHAPE] to maximum and
check that the waveform is similar to that
in Figure C
-
Repeat steps (3) and (4) until
both ends of [WAVE SHAPE] are a best match
for those in Figures B & C
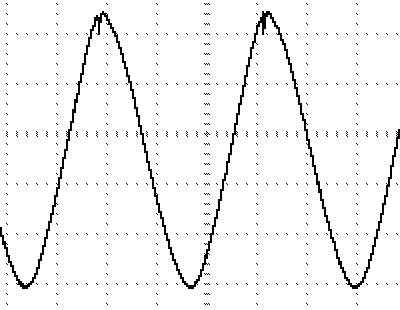
Figure B
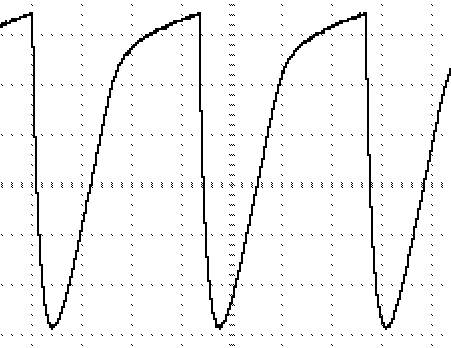
Figure C
Step 3 - HF Trim:-

Stage 1:
-
Set the '5K Lin' pot fully
anti-clockwise
-
Monitor [SAW DC]
-
Set [CV-B] pot to '0'
-
Set [CV-A] to minimum
-
Patch REFERENCE to [CV A]
-
Set REFERENCE to 0.0V
-
Adjust [FREQUENCY] for 300Hz
using [CV-B] pot for fine tuning
-
Set REFERENCE to 2.0V
-
Adjust ‘5K Lin’ pot for 75Hz
-
Repeat steps (4) to (5) for best
accuracy
Stage 2:
-
Set REFERENCE to 2.0V
-
Adjust [FREQUENCY] for 300Hz
using [CV-B] pot for fine tuning
-
Set REFERENCE to 0.0V
-
Adjust P102 for 1200Hz
-
Repeat steps (1) to (5) for best
accuracy
Calibration of the HF Trim is a series
of successive approximations so stages 1 and 2
should be repeated several times for optimum
accuracy.

